Documentation Index
Fetch the complete documentation index at: https://docs.tryarchitect.com/llms.txt
Use this file to discover all available pages before exploring further.
Prerequisites
Before you start, make sure you have:- Access to your HubSpot account
- Access to the Architect platform (app.tryarchitect.com)
- A HubSpot form created or ready to create
- Complete Steps 1-3 before setting up the HubSpot connection in Step 4
How it works
When a visitor lands on your Architect page, the HubSpot tracking script drops a cookie (hutk) on the visitor. When that visitor submits a form, Architect sends the form data along with the tracking cookie to HubSpot via the HubSpot Forms API. HubSpot then associates the submission with the visitor’s browsing activity, giving you full attribution on the contact.
Step 1: Find Your HubSpot Account ID
You need your HubSpot account ID so Architect can connect your form submissions to the correct HubSpot account. HubSpot may also refer to this as your Hub ID or Portal ID.Step 2: Create or Choose an Existing Form in HubSpot
You need a HubSpot form so you can match the Architect form with HubSpot and paste the values into the existing fields.Get the data-form-id
In HubSpot, go to Marketing and then Forms. Select your form, then click Share and Embed code.Copy the embed code and look for the The
data-form-id value. This is your HubSpot form ID.The embed code will look something like this:data-portal-id is your account ID and the data-form-id is your form ID.Find your field internal names
For each field on your form, note the Internal Name. This is how you match the fields with Architect’s form. Click a field to see its internal name under the property settings.Common default internal names:
| Field | Internal Name |
|---|---|
email | |
| First Name | firstname |
| Last Name | lastname |
Step 3: Create a Form in Architect
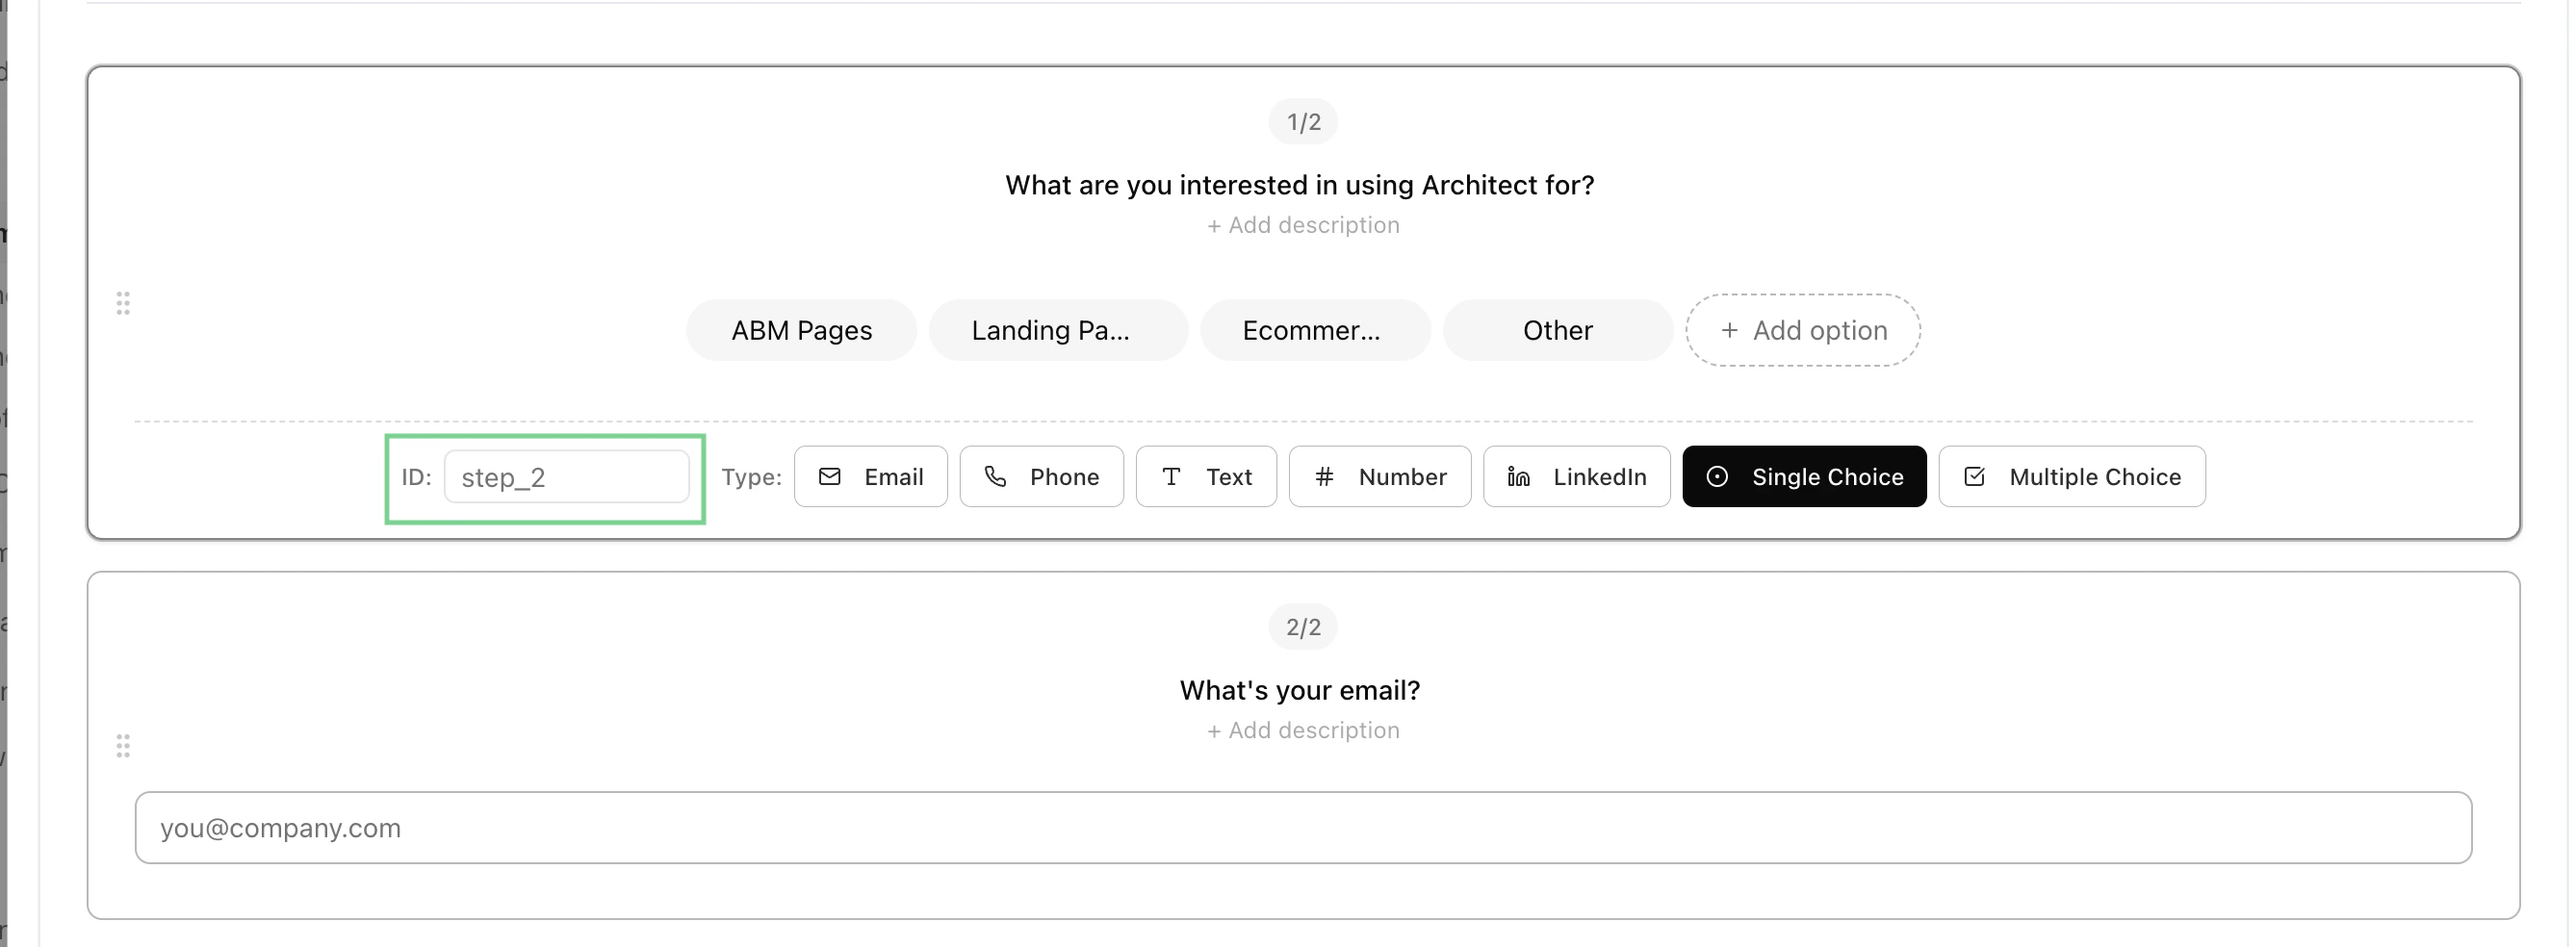
Create or select a form in Architect
In Architect, go to the designated page, then click Manage, Settings, and Conversion Action. Go to Forms and then Manage Forms. Create a new form or choose an existing one.Match this form to the same fields as your HubSpot form. Make sure the Architect ID is the same as the internal names in HubSpot, as this is how the fields are matched when the submission is sent.